Gorgeous Glow: How to Create a Backyard Lighting Setup for Under $40
Let’s be real: you don’t need designer fixtures to make your backyard glow. You need a plan, a tiny budget, and a little creativity. I’ll show you how to turn $40 into a cozy, Instagrammable vibe that makes your neighbors suspicious of your electric bill. Ready to make your outdoor space look expensive without crying at checkout? Let’s go.
Plan Your Vibe (And Your Budget)
You need a quick map, even if it’s on a napkin. Decide where you want light: the hangout zone, the path, the plant corner, or the grill. Then pick a “hero” effect, like glowing string lights or warm solar path markers, and build around it.
Example $40 budget:
Tired of snacking when you’re not even hungry? This reset helps you stop the loop and feel back in control.
A simple reset for moments when cravings take over. Easy to use, easy to repeat, and designed to help you feel satisfied instead of stuck.
- $15–$20: Solar string lights (33–50 ft, warm white)
- $10–$12: 4–6 pack solar path lights or stake spotlights
- $5–$8: Tea lights + jars or LED puck lights
FYI: Prices swing by season and store, but you can hit this range at big-box stores or online deals.
Choose The Right Lights (Cheap, But Not Cheapy)
Pick lights that give you max glow for minimum cash. You want reliable, weather-friendly, and warm.
Best Budget Picks
- Solar String Lights: Look for 200–300 LEDs on copper wire, warm white, with a small panel. They drape easily and sip sunlight for power.
- Solar Path Lights: Basic 4–6 packs work great for edging and steps. Choose warm white, not cold blue (unless your vibe is “sci-fi lab”).
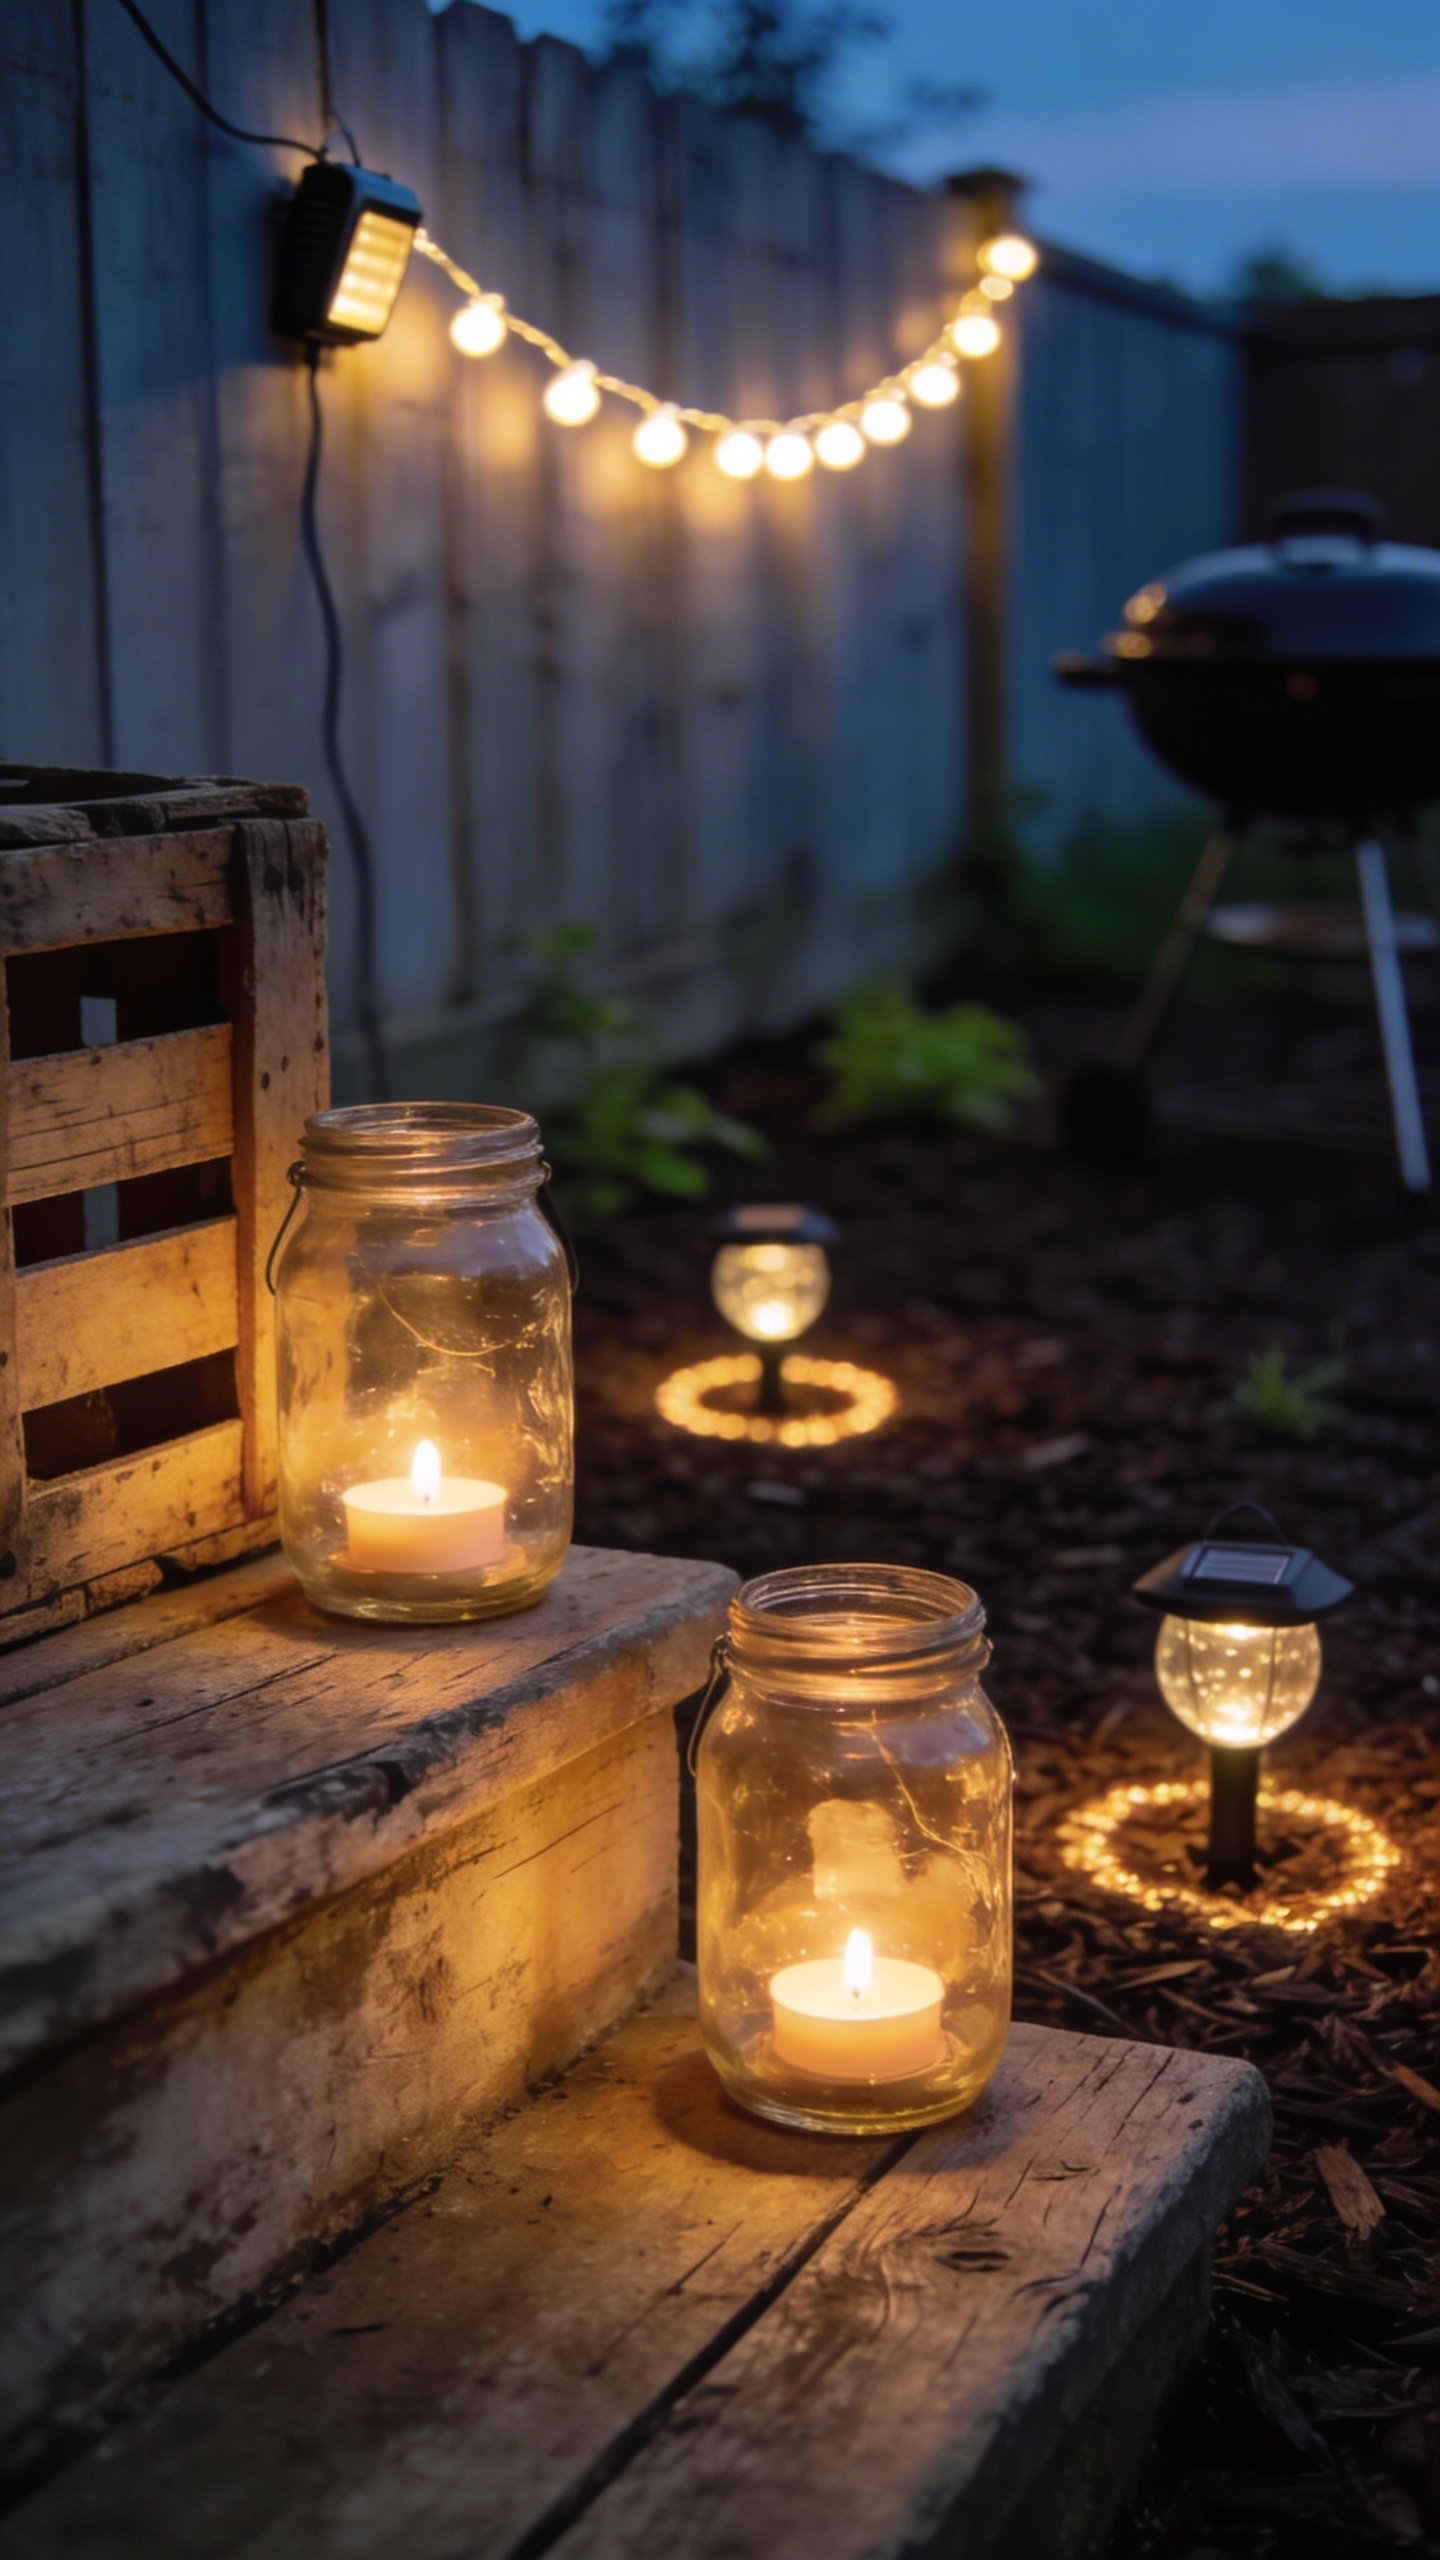
- LED Tea Lights / Puck Lights: Battery-powered, handy for tables and tucked corners. Reusable and safer than actual flames around pets/kids.
Specs That Actually Matter
- Color Temperature: 2700–3000K = cozy and inviting. Anything higher looks harsh.
- IP Rating: IP44 or better for outdoor use. It means “rain won’t ruin your party.”
- Runtime: 6–8 hours after a sunny day for most solar sets. Good enough for your evening hangs.
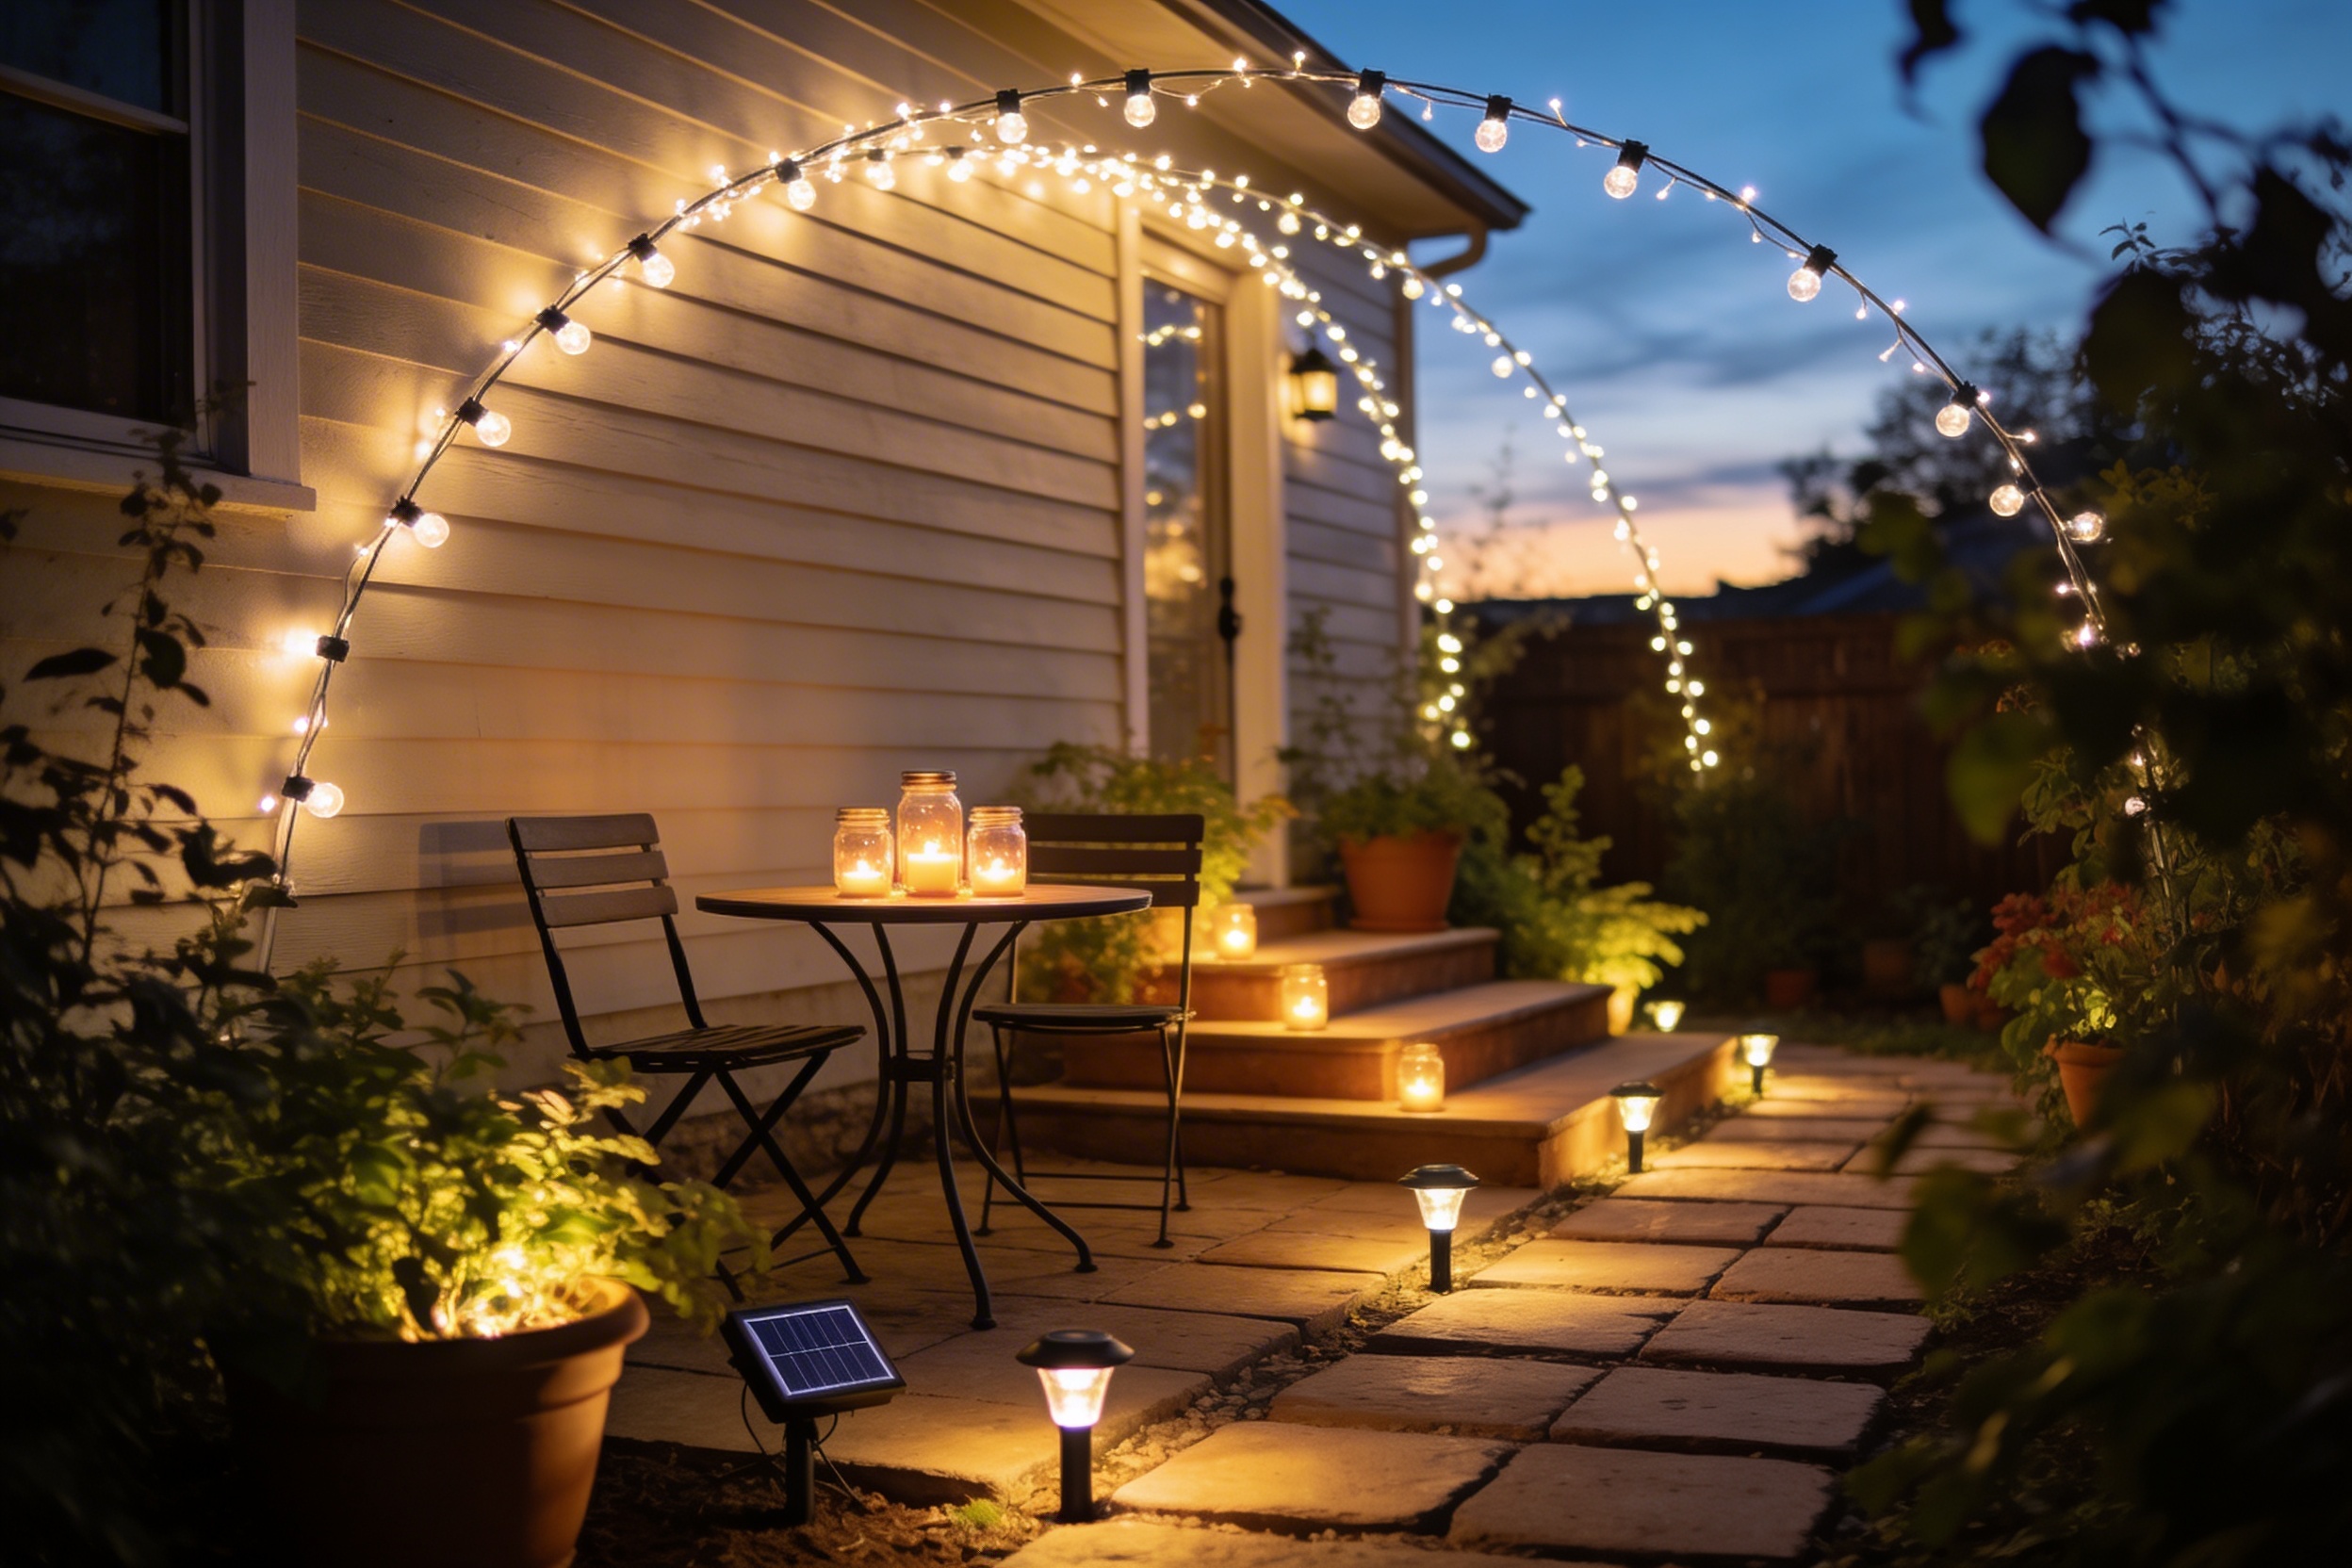
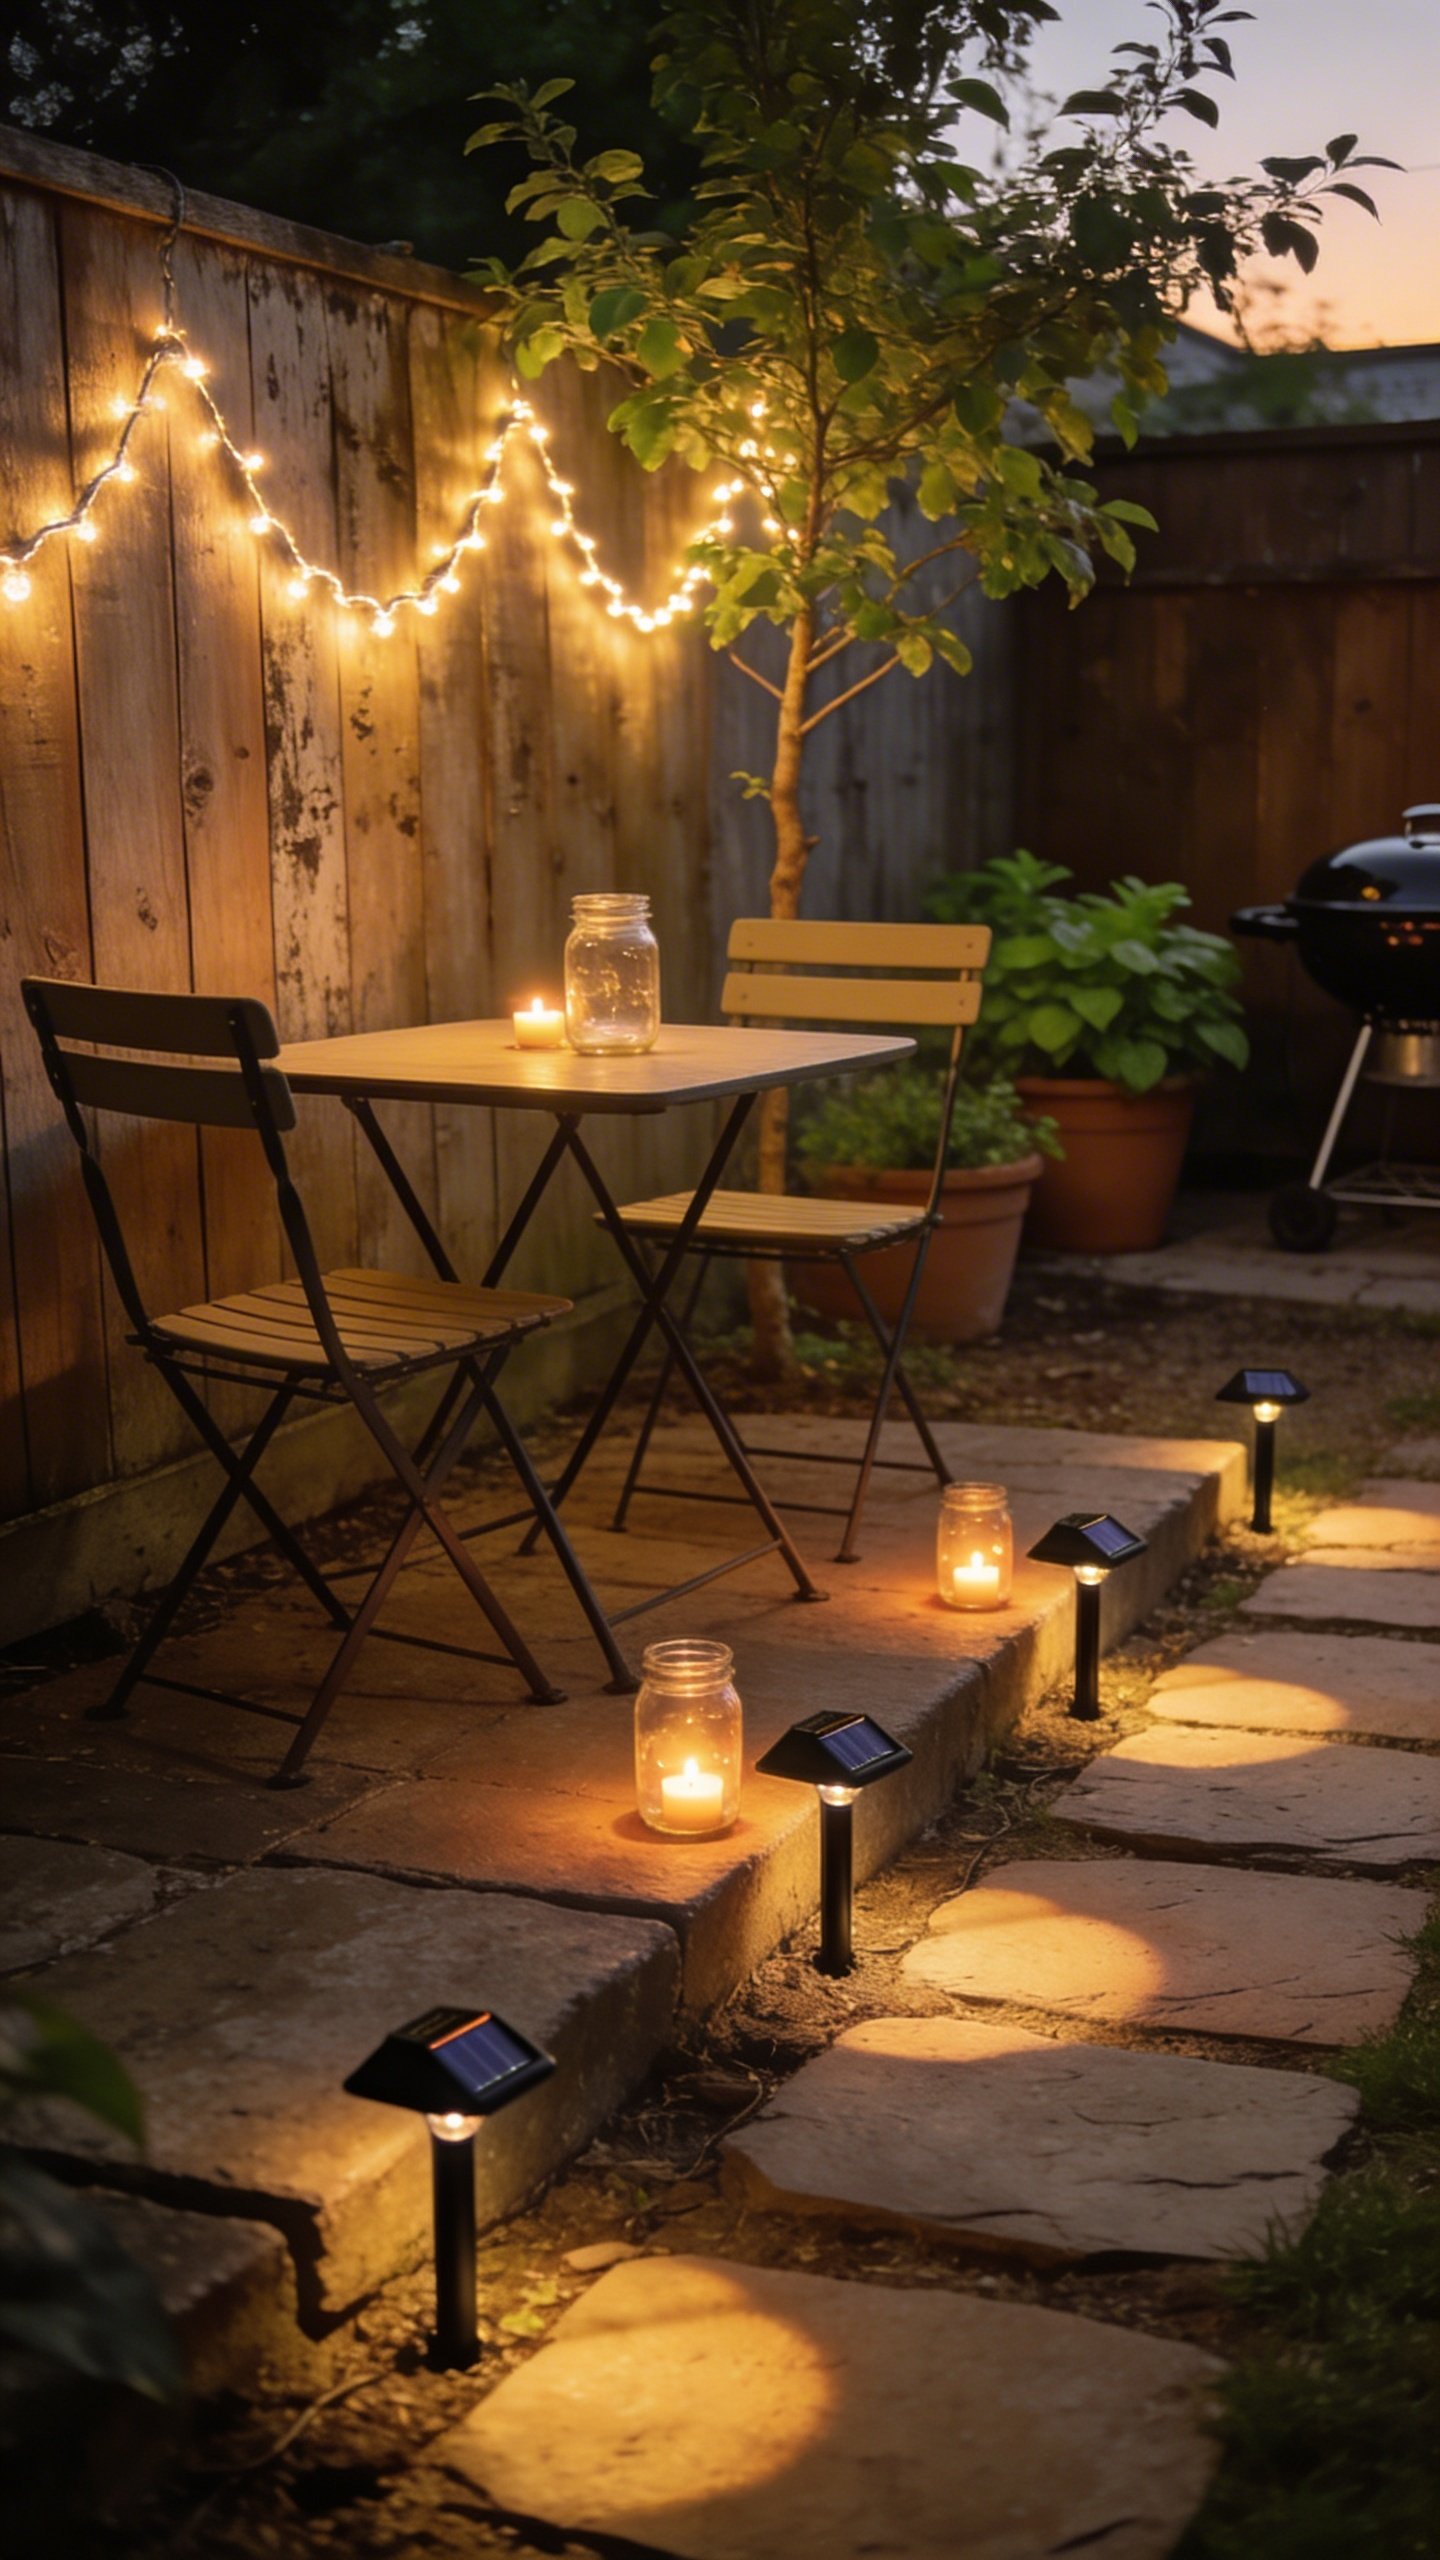
Layout Tricks That Look Designer (But Aren’t)
You don’t need perfection. You need layers and focal points. Light from different heights: above (string lights), mid-level (path lights), and low (tea lights).
Easy Placement Ideas
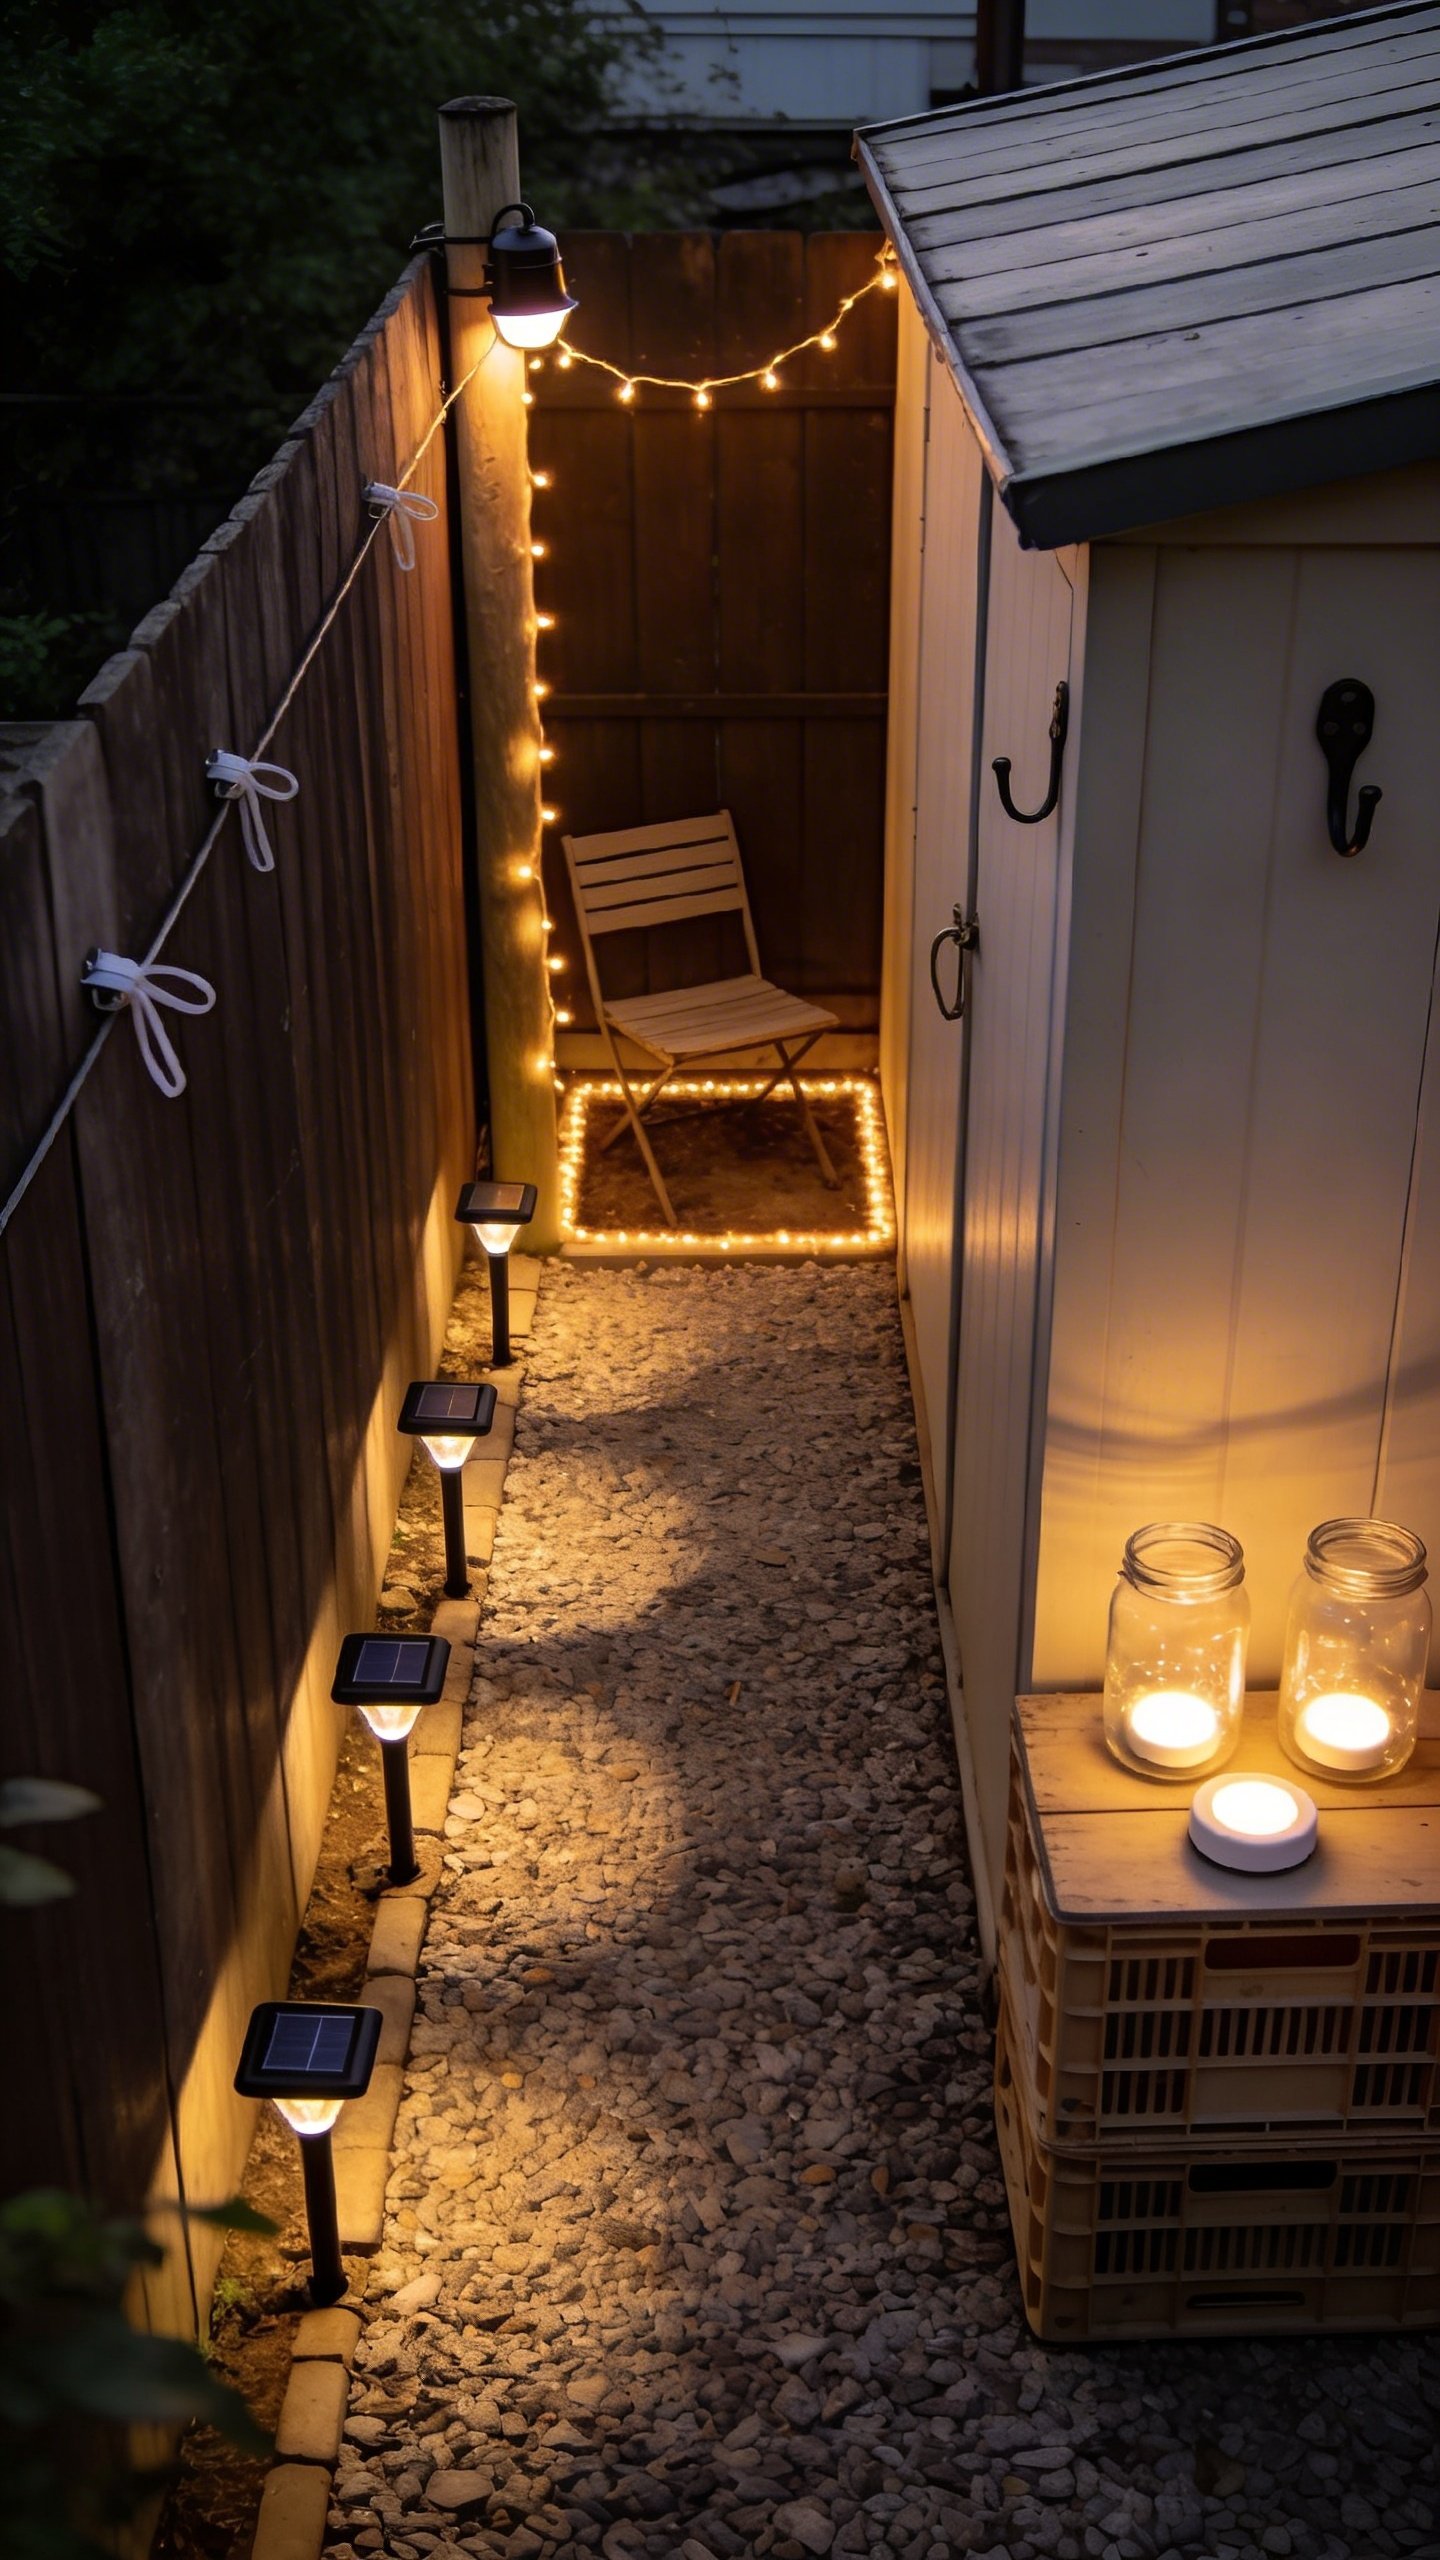
- Overhead Glow: Drape string lights in a zigzag over seating. Use existing hooks, fence posts, or tree branches.
- Edge The Path: Drop solar stakes every 3–4 feet on one side only. It looks intentional and uses fewer lights. Win-win.
- Highlight A Feature: Aim one or two small solar spotlights at a tree trunk, plant bed, or wall art.
- Tabletop Ambience: Pop LED tea lights into clean jars or glasses. Instant lanterns. Cute and basically free if you recycle jars.
Install In 30 Minutes Flat
You don’t need tools beyond scissors, tape, and maybe a zip tie or two. Promise.
Transform Your Home With 7,250+ Stunning Landscaping Designs—No Expensive Designers Needed!
- 🌿 Access 7,250+ stunning landscaping designs.
- 💰 Save thousands—no pro designer needed.
- 🏡 Plans for gardens, patios, walkways, and more.
- ✨ Simple, beginner-friendly DIY layouts.
- 🛠️ Customize any design to fit your yard.
Step-By-Step Setup
- Charge First: Put solar panels in direct sun for a few hours. Yes, even before installing. Better runtime tonight.
- Run The Lines: Hang the string lights loosely. Avoid sharp bends. Keep the solar panel where it sees sun—fences, railings, or a stake in a planter.
- Stake The Path: Press solar stakes into soil at a gentle angle away from foot traffic. Space evenly. Don’t overthink it.
- Accent Touches: Place tea lights in jars, set on tables or steps. Bonus points for colored glass or frosted jars for a diffused glow.
- Test And Tweak: Wait for dusk, then adjust. Lift or lower lines. Rotate panels for best charge direction (south-facing is clutch, IMO).
Small Upgrades That Make A Big Difference
These are dirt cheap and instantly level up the look.
- Zip Ties + Command Hooks: $3–$5 and your lights stop sagging like a sad noodle.
- Reflective Backing: Place a white tile or foil behind a spotlight to bounce light and look brighter for free.
- Frosted Jars: Lightly sand glass or use a $1 frosted spray for soft, luxe glow.
- Warm Filters: If your lights lean too cool, a tiny piece of amber cellophane inside the jar warms it right up.

Make It Weather-Ready
You want this to survive a sprinkle, not become backyard confetti.
Keep It Secure
- Anchor Panels: Zip tie solar panels to fence slats or plant stakes.
- Manage Cords: Coil slack and tape it along a beam or rail so wind can’t snag it.
- Elevate Connections: Keep connectors off the ground. A simple clip on the fence works wonders.
Battery + Solar Tips
- Sunlight Angle: Tilt solar panels about 30–45° toward the sun. Avoid shade from trees and umbrellas.
- Winter Reality Check: Shorter days = shorter runtime. Add a couple battery tea lights on gloomy days. FYI, that’s still on budget.
Style Ideas On A Shoestring
You can theme the whole space with just a few tweaks.
- Boho Cozy: Drape lights around a blanket ladder or trellis. Add lantern jars at different heights.
- Modern Minimal: Straight lines, even spacing, warm white only. Clean and calm.
- Garden Party: Wrap copper-wire lights around planters and low branches. Instant fairy garden energy.
- Campfire Vibes (No Fire Needed): Cluster 5–7 tea lights in jars on a low table. Surround with stones for the “fire ring” look.
Sample $40 Build You Can Copy Tonight
Here’s a plug-and-play combo that works in most yards or balconies.
- $18: 50 ft warm white solar string lights (copper wire)
- $12: 6-pack warm solar path lights
- $6: 12-pack LED tea lights
- $3–$4: Zip ties + Command hooks (optional but clutch)
How to place it:
- Drape the string lights above seating, zigzagging twice.
- Stake 4 path lights along the walkway and 2 to frame your seating area.
- Drop tea lights into jars and line them on the table and steps.
Result: Layered light, cozy warmth, no ugly glare, and under $40.
FAQs
Can I actually do this without an outlet?
Absolutely. Solar string lights and path lights handle all the heavy lifting. Add battery tea lights for targeted glow. No cords across the lawn, no extension chaos, just sun power and smug satisfaction.
What if my yard doesn’t get much sun?
Angle panels to the sunniest patch and avoid shade from trees and fences. If you still need a boost, swap in a small set of battery-powered string lights for the shadiest area. Mix solar and battery so you’re not stranded on cloudy days.
How do I keep it from looking cheap?
Go warm white, not blue. Keep lines clean and spacing even. Use jars, planters, or hooks instead of dangling everything from one nail. A tiny bit of symmetry screams “intentional,” IMO.
Are these lights safe around kids and pets?
Yes, especially solar and LED tea lights since there’s no heat or flame. Keep small batteries and loose wires out of chew range. Stake lights firmly so nobody turns your path into a jousting arena.
How long will these budget lights last?
Most budget solar sets last a season or two with normal use. Store them during extreme weather, clean panels occasionally, and replace rechargeable batteries if runtime dips. You’ll stretch their life way longer.
Can I add color without blowing the budget?
Totally. Slip colored paper or cellophane into jar lanterns, or wrap a tiny piece around a tea light. Or grab one strand of warm white and one strand of soft amber for a layered tone that looks rich, not rave-y.
Conclusion
You don’t need a pro installer—or a second mortgage—to make your backyard glow. With one strand of solar string lights, a few path markers, and some DIY jar lanterns, you’ll get major ambience for pocket change. Keep it warm, layer the heights, and anchor everything so it survives a breeze. Then invite friends over and pretend you always knew what “color temperature” meant.